Do You Need a New Angle on Your Playing?
Wayne Burak
One of the most tricky cello setup issues to self diagnose is the presentation of neck angle fatigue.
Symptoms:
- You have to adjust your bow stroke to avoid hitting c bout edges..
- The cello sound core is lost because your neck angle has dropped over time and is creating marginally successful practice days and challenging performances..
- Nasal sounds are finding a home inside your cello…real clarity and power are only a misty concept…
- A single note repeatedly refuses to cooperate…
- A major attack simply evaporates without an actual sound…
- Your friends start to avoid you…
- You have thoughts of switching to viola…
Help:
Seeing things from a different perspective can help your playing turn a corner. If your instrument was made recently, say in the last decade or two, (or maybe even three or four depending on things) your cello neck angle may be just fine. Presentation of any of the above symptoms in this case, might be an indication of the need for soundpost, bridge and/or fingerboard attention. All of these parts must work together and be adjusted well (and do remember to change your strings!).
However, time takes its toll on cellos as on all string instruments, and all necks eventually need corrective angle work. Sometimes even a recently made instrument can have a settling of the neck angle. Sustaining constant and unyielding tension, the neck performs a complex role providing a reliable and sound base for the fingerboard, nut, pegs and strings. And all of this without complaining, whining or negotiating a higher fee!
Temperature and humidity changes, as well as constant traveling and use all play a part in the reduction of setup tension which often results in less resistance in the instrument’s body structure. The decrease in projection and height affects the corresponding trajectory of the neck above the instrument and of course, bridge height.
What does this actually mean to you, the cellist? This depends on how the repair/adjustment professional handles issues…
The easiest way for a repair person to compensate for a sinking neck angle or cello structure which has succumbed to the dropping neck syndrome, is to keep lowering (cutting down) the top of the bridge. This is often done once or twice, or until the string height is comfortable—(with 5.0-5.5 mm being a traditional distance for the A string to fingerboard distance measured at the bowing end of the board). While this is acceptable to do a couple times to fine tune any cello action, if it continues over a span of years, there will be little wood left above the bridge heart. This alteration in the bridge structure and lower tension offered by the decrease, accents various higher frequencies, particularly on the A string. The result in more severe cases, can make the A string sound like a nasal bowed banjo string! And of course, the balance of the cello is affected as well, with the C string typically losing a crisp full bodied attack and the D & G strings withering as well.
In addition to the acoustical issues, the low neck angle also dictates the geometry of the playing action, and whether or not there is sufficient room for the bow to clear the c bouts without scraping either top edge. (Last time I checked, no one enjoys having rosin all over their left knee after a concert!)
So without correction, the low neck angle decreases overall playability, reduces power, and limits tonal colors. The physics of the cello now dictates performance options and negatively influences the cellist!
Let’s take a look at one of the most popular options to correct the sunken neck angle. The procedure is non invasive to the cello body and does not involve opening it to add block/neck spacers or cutting the old neck out of the top block as is the case with a neck reset. It is a favorite in my workshop as it utilizes the existing fingerboard to create a thin wedge onto which a new fingerboard is added. The angle can be precisely controlled and the result is a very professional cost effective and efficient solution. Because we are leaving a very slim wedge under the fingerboard, the increased neck thickness is negligible and most cellists don’t even notice it. Should the operation require a more substantial addition, a small amount of wood can be carefully taken out of the back of the neck to compensate.
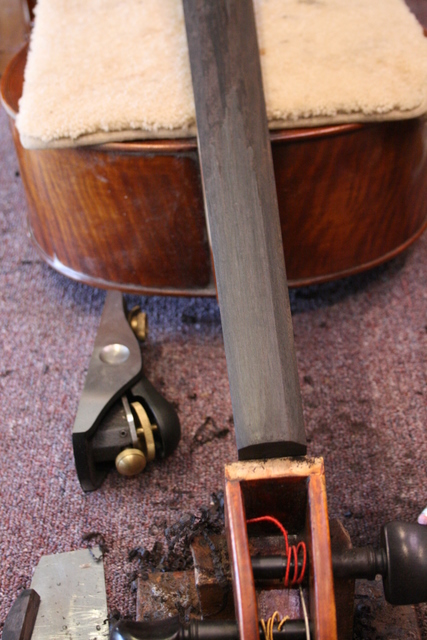
The first illustration shows the measuring of the neck angle with a straight-edge ruler on top of the fingerboard projecting down toward the bridge where it intersects with another ruler at the bridge line location. This is the all important neck angle measurement which dictates exactly how high the corresponding bridge will be cut in order to facilitate the proper height of the strings. The pictured cello had a neck angle drop to the 75mm area. Typically this should be 80-82mm, although some instruments will be successful slightly higher or lower. The extremes, however, of too low i.e. Under 76mm or too high 85+mm cause issues which interfere with the performance of the cello.
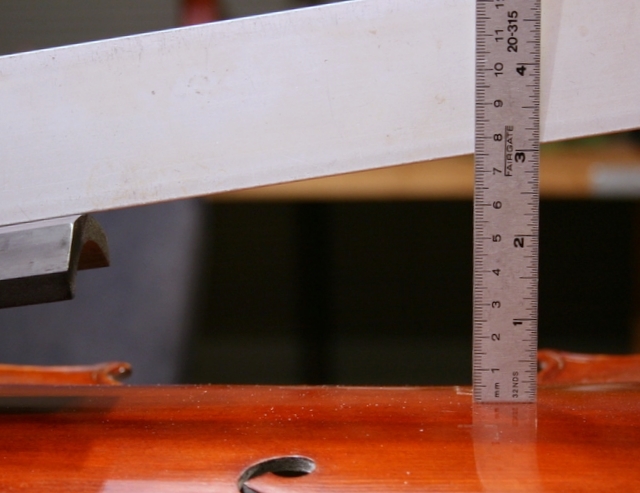
1 Neck angle measurement of 75mm
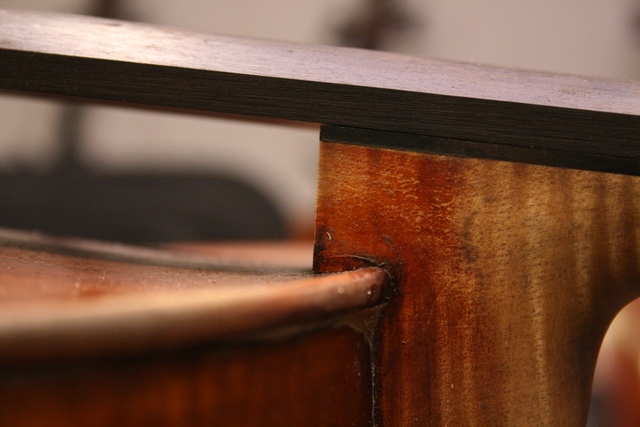
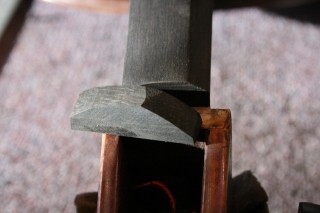
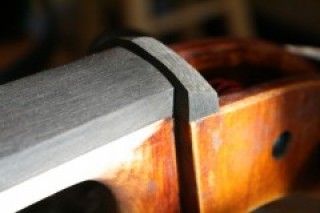
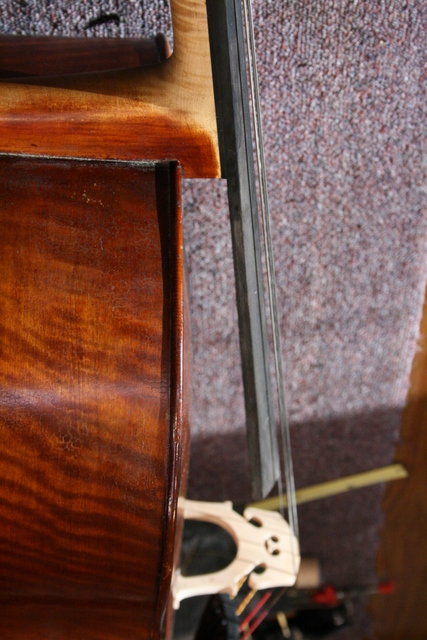
No. 2-4 details the severing of the fingerboard near the neck to create the wedge base. (This is the surgery part..) This operation is done with a Japanese woodworking saw called a dozuki which cuts wood on the pull stroke for great control. It creates a clean cut.
 2
2
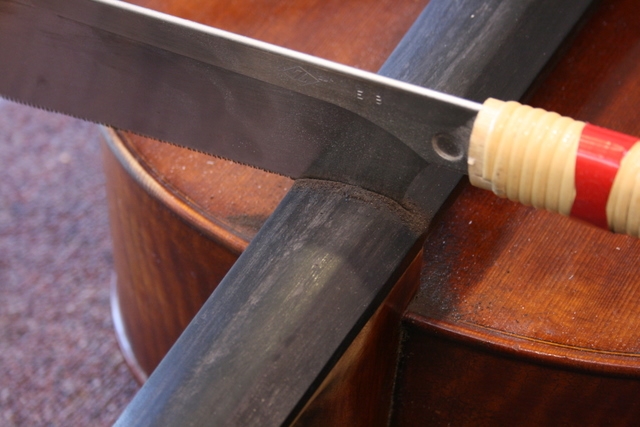
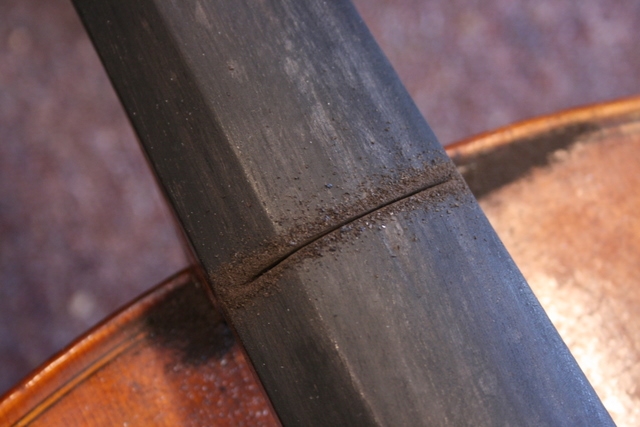
3
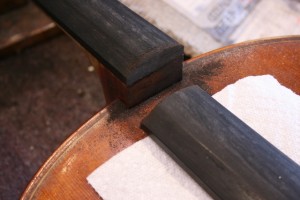
4
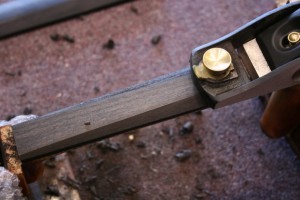
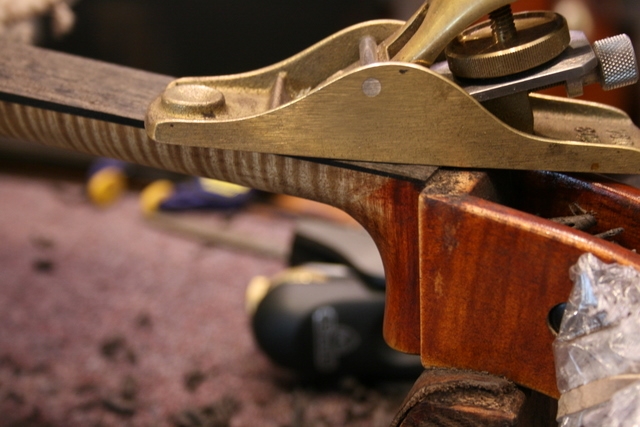
No. 5-11 detail the planing and preparation of the wedge base for the mounting of the new fingerboard. Note that this is done with two different size woodworking planes—the smaller brass one is a Lie Nielsen 103 and the larger, a Stanley no 91/2. Of course, all of the work is done with hand tools! The angle is carefully calculated and the entire wedge surface must be perfectly flat to provide a firm and true gluing surface.
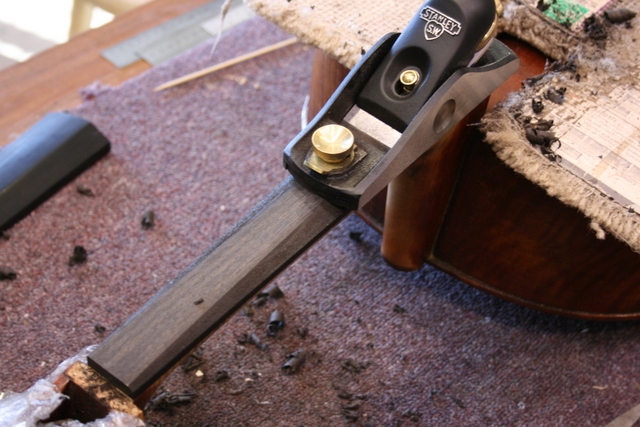
5
6
7
8

- 9
- 10
-

- 11
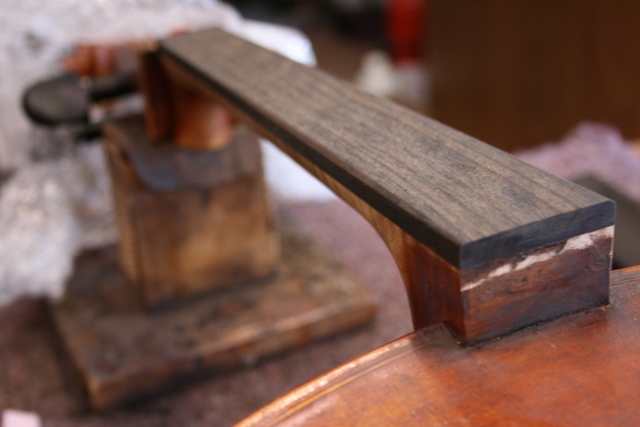
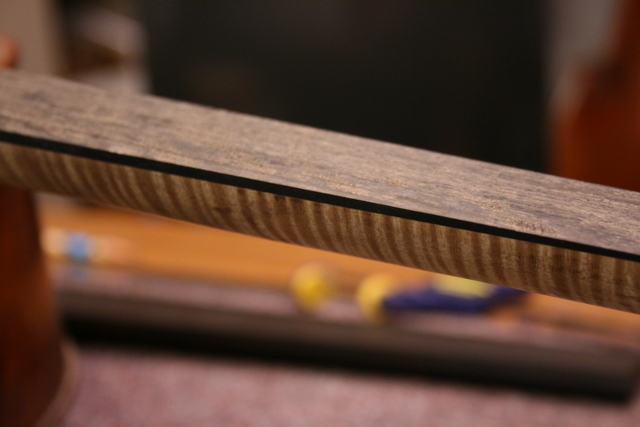
No. 12-13 shows the new fingerboard during the fitting process, and the 14th, the preliminary thickness before trimming to final dimensions.
- 12

- 13

- 14
No. 15-17 shows the fingerboard surface work, and the scraping and shaping of its playing surface. This is done with planing and also a good deal of scraping with thin metal woodworking scrapers, as well as finally finish sanding and polishing. The C string ledge (also known as a Romberg ledge) is a drop off on the bass side of the fingerboard and must be cut so that its dividing ridge is exactly ½ way between the C and G string throughout the length of the fingerboard. Also, there must be scaled concavity worked into the fingerboard at this point, so that the playing surface is not flat. I think of this operation as a very intense but rewarding meditation with the ebony! Every piece of wood planes and scrapes differently, and the wood lets you know how to best cut it.
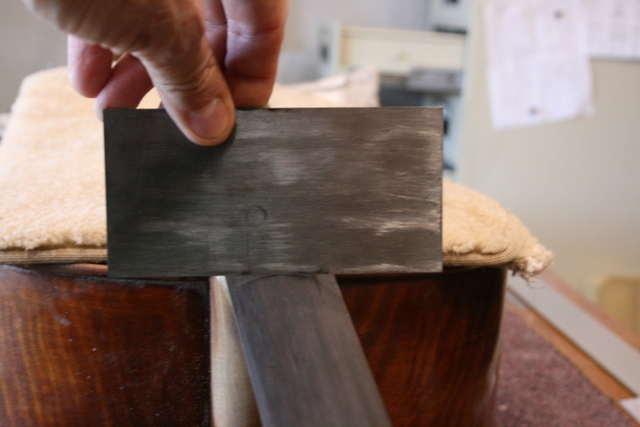
- 15
-
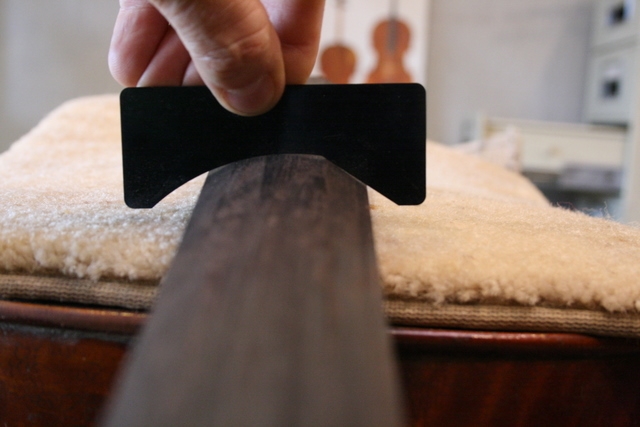
- 16
- 17
-
No. 18–19 shows the stages of the nut fitting and shaping, the preliminary step before cutting the string grooves.
- 18
-
- 19
No. 20 is the final thickness and finish of the neck and wedge.

- 20
- No. 21 shows the neck angle now at a bit over 80mm which is perfect for our subject.

- 21
22: with the new fingerboard, wedge and bridge set up ready to go!
- 22
And as final thought on this operation, please note:
This neck angle procedure is an effective solution to re-establishing balance and correct tension in the cello setup. Keep in mind that there are limits to adjustments of this kind. A slight rise in height of even 2-3 mm adds significant tension to the cello. For an instrument which has been set up with a low neck angle for a long time, the cello structure will be more highly energized with the rise in tension. This has an overall positive effect on most cellos. Occasionally, the higher tension exacerbates a latent wolf note or makes an existing one more active as a byproduct of the new tension level. Careful soundpost adjustment, tailpiece tension regulation, and internal wolf dampers are effective balancers. (Wolf notes and their handling are a subject of a future post.)
Experienced repair and adjustment professionals know that most classic old cellos have had some neck work done at some point in their lifetime. So working on an original baroque neck is quite rare. With very old delicate instruments it is a good idea to lightly glue the new fingerboard to the wedge before the final assembly. I cut a test bridge and nut, string the cello up to tension, and try it, to assess the overall changes. The older the instrument, the longer period of time it has been setup with lower tension strings, parts, etc. The gut core strings, lower neck angles, shorter fingerboards, etc of the 1600s-1800s have imprinted these old masterpieces and often a 200-300 year old cello may take a substantial period of time to be happy with the new vibrational diet!
Subjects: Instrument Care
Tags: acoustics, Adjustments, alterations, bridge, Burak, cello, cello setup, cellobello, changes, fingerboard, humidity, neck angle, performance, strings, Wayne, woodworking
AUTHOR