100 Cello Warm-ups and Exercises Blog 19: Cello Geography Part 5: Thumb Position and the Upper Registers
Robert Jesselson
Blogs #15 and #16 discussed the geography of the lower regions of the cello. In sorting out the “latitude” and “longitude” in this part of the instrument the main organizing principle is the knowledge and use of positions. We identify the positions by the location of the first finger on the string up through Seventh position, with “normal” and “extended” variants throughout. When the first finger is playing the A in seventh position on the A string the thumb is still behind the neck—so this is still considered neck position. Seventh position is a significant place on the cello, because it divides the string into two equal parts, and as a result we find the A harmonic there as well.
After seventh position, the thumb is used as a finger up on the fingerboard. (It can also be used on the fingerboard in the lower part of the cello, and is employed there very often for octaves, double stops and special fingerings, even in literature as far back as Boccherini and Haydn.) When the thumb is up on the fingerboard we call it thumb position. I described the basic outline of the thumb in thumb position in Blog #18 (the “inny and the outy”, the C-shape, the Perfect Fourth between the thumb and the third finger, etc.)
The organizing principles of geography in thumb position are different from those of the neck region. We don’t identify positions in the upper part of the cello. Instead, there are three important techniques for understanding location and for navigating around in the cello’s upper regions.
1. Using nodes and other fixed points for reference
2. Measuring distances:
a) understanding and using intervals
b) the “Configuration of the Hand” across string
3. Using the basic thumb position, as described above, and organizing the finger spacing with tetrachords
1. Using nodes for reference
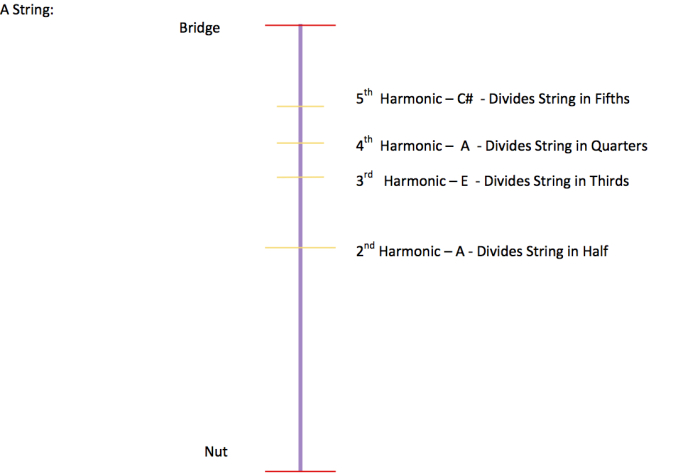
We use the harmonic nodes on the cello in the upper positions as a fixed reference in our GPS system to locate where we are. Most cellists are aware of the second harmonic, because that is often used to help tune the instrument. For example, on the A string the second harmonic is the A in seventh position, which divides the string in two parts. (The first harmonic is actually the open string; the second harmonic is also called the first overtone – but rather than confusing things further I will just refer to these as harmonics!). The 3rd harmonic on the A string is the E that divides the string into three parts. The 4th harmonic is the A that divides the string into four parts, and the 5th harmonic is the C# that divides the string into five parts.
Below is a simple chart that shows the most important harmonic nodes. The view here is looking down the cello towards the bridge (bottom up). There are many more harmonics on the string than indicated, but these are the most important nodes to use as points of reference. Naturally these harmonics repeat themselves in mirror image going up the string (but we don’t need them right now for this discussion about thumb position). We need to practice finding these nodes using muscle memory with a certain amount of rote practicing, so that we can locate them easily. The 3rd, 4th and 5th harmonics should become as easily accessible as the 2ndharmonic.
Another piece of information that is useful is to know is what note is right at the end of your fingerboard. Usually it is an F or F#, though depending on the length of your fingerboard it could range from an E to a G.
Once you know where the harmonic nodes are, or knowing what the note is when you put your finger right on the edge of the fingerboard, you can find other notes around by using the second method mentioned above:
2a. Measuring distances – understanding and using intervals
The second important system for understanding the geography of the instrument is to know the distances between notes in different parts of the fingerboard. Basically we measure distances from the node to a note, or from one note to the next. Our unit of measurement is the interval. Unlike the piano, where the distance between half steps remains constant through all 7+ octaves, on the cello a half step (or any interval) gets smaller as you go up the string. This is why it is so important to do scales and arpeggios in all keys in the upper part of the cello – to know and feel the distance of a whole step or a half step, or a minor third or a perfect fourth all over the cello.
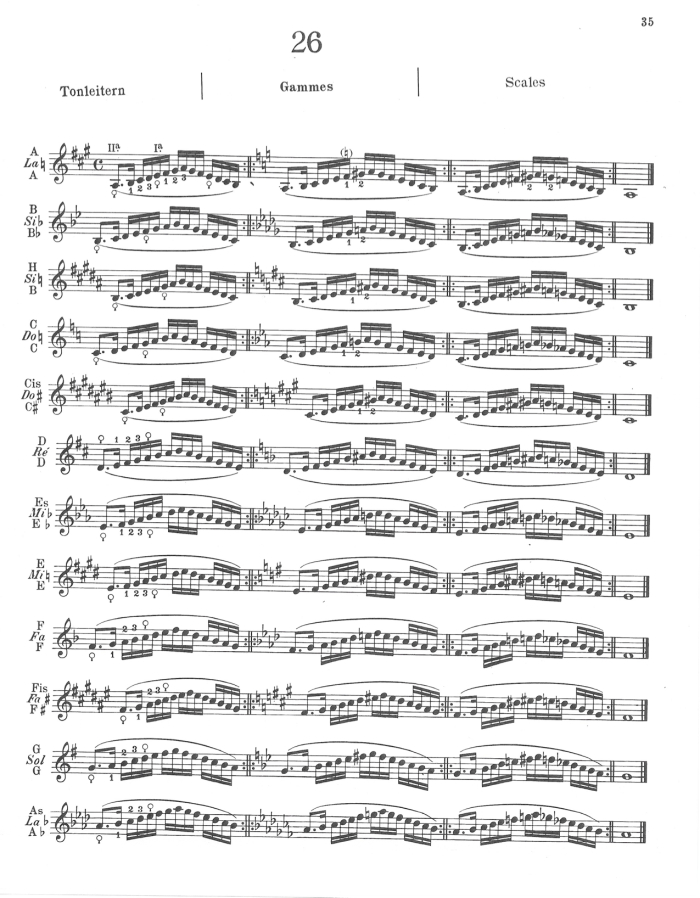
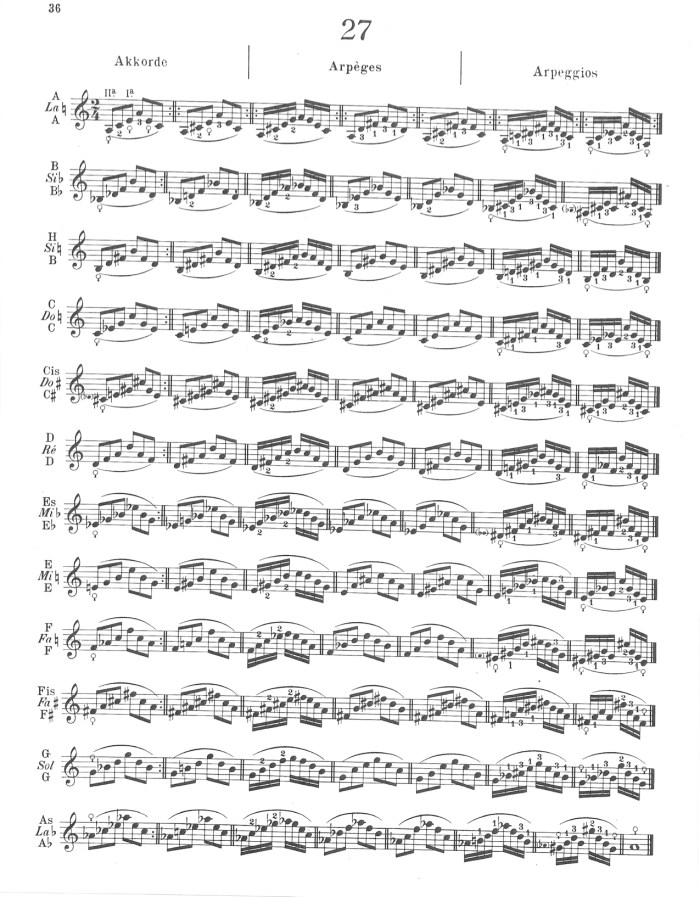
Since the basic thumb position involves a perfect fourth between the thumb and third finger, it is important to do exercises for sensitizing this distance all over the cello. A great warmup is to do the Feuillard thumb position scales (#26) and the arpeggios (#27) in every key:
Practicing octaves is important for the same reason, since the octave shape across strings in thumb position is the same as a perfect fourth on one string. Similarly, it is great to practice artificial harmonics to maintain the P4 hand position on one string. So, practicing artificial harmonics is a great way to reinforce octaves, and vice versa. And both are great for maintaining the all-important relationship between the thumb and third finger.
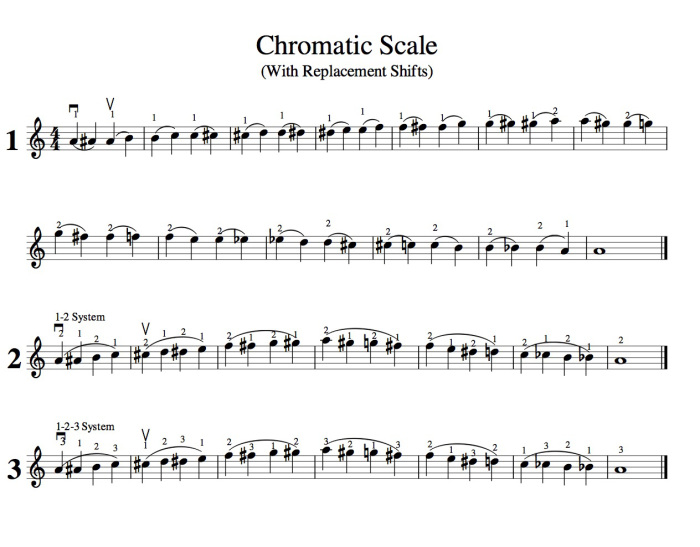
It is critical for cellists to know the sound and spacing of the intervals all over the cello, both on one string and across strings. I like to do whole tone scales and chromatic scales to focus on whole steps and half step distances up the cello.

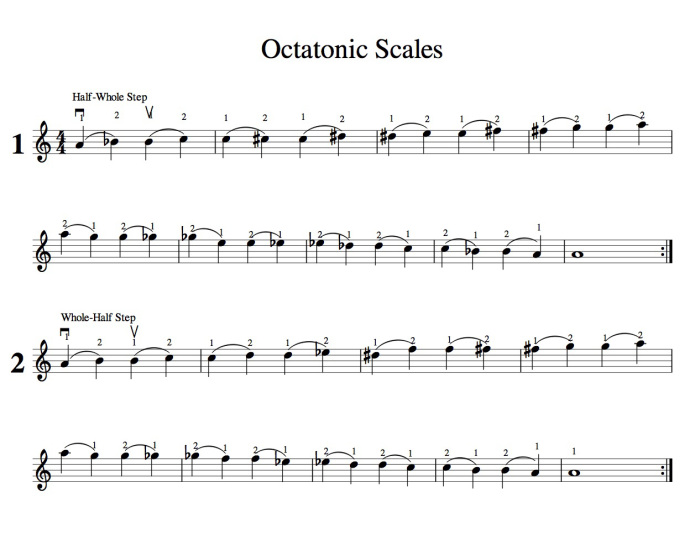
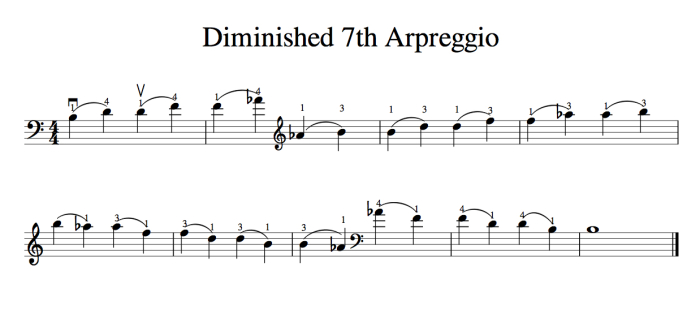
 Two other warm-up exercises that I like to do are great to focus on intervals and distances going up a string: an octotonic scale (alternating whole and half steps), and a diminished seventh arpeggio with a replacement fingering to sensitize the distance of the ascending and descending minor thirds.
 Once the intervals are clearly understood, and the hand “knows” the distances in different parts of the cello, we can use this information to find notes related to the nodes.
In the next Blog (#20) we will discuss the Configuration of the Hand, Tetrachords, and thumb position scales using Tetrachords.
Subjects: Practicing, Technique
AUTHOR